Last updated on December 13th, 2023 at 10:07 am
As the colder months approach, more homeowners will be thinking about their central heating systems. Many homes are due a boiler upgrade, but the process can seem difficult and complicated.
23 million UK homes have a gas boiler already, but sometimes they break down, or homeowners want to upgrade to a more efficient boiler system. In this guide, we explain exactly what happens during a boiler installation, step by step.
Step 1: Finding an Installer
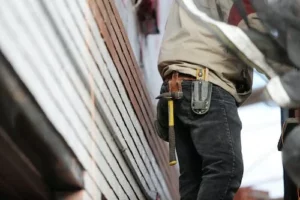
The first step of a successful boiler installation lies in selecting the right installer. It is highly recommended to reach out to at least one installer who can visit your home, assess your heating and hot water needs, and provide valuable insights. It would be even better to get a quote that compares multiple providers.
Installers may differ in terms of cost, expertise, and recommendations, making it essential to gather multiple perspectives. During these consultations, installers will discuss whether a straightforward replacement boiler suffices or if alternative options should be explored, taking into account features like smart functionality, weather compensation, and load compensation.
You will need to get a comprehensive quote for the boiler installation. This quote should encompass the cost of supplying and fitting the boiler, along with additional work such as power flushing the heating system, necessary control system upgrades, and any required system changes.
Warmable can help you get a free quote. Simply fill in our quick form and one of our advisors will be in touch as soon as possible. We compare the whole market to get you a free, comprehensive quote of how much your boiler installation project will cost.
Step 2: Choosing the Right Boiler Size
Picking the appropriate boiler size is a critical decision that directly impacts performance. Factors such as water usage, available space, and the desired installation location all play roles in making the right choice.
Considerations regarding the number of occupants, space constraints, and preferred installation location guide the decision between conventional boilers for higher water demands or combi boilers for lower usage.
You should consider:
- Water use: The size of your household and daily water consumption are crucial factors. Larger families with higher water demands might benefit from conventional boilers, while smaller households may find combi boilers more suitable.
- Space: If space is limited, especially in lofts or airing cupboards, combi boilers, which do not require a hot water cylinder, are a practical choice.
- Location: For minimal disruption, it is common to install the new boiler in the same location as the old one. While kitchens and cupboards are popular choices, almost any room can be suitable with the right pipework and correct flue positioning.
- Time: While there is no specific ‘right’ time for a boiler installation, planning it during the summer months can be advantageous. With lower reliance on heating and hot water, the process is likely to be less disruptive.
Step 3: Pre-Installation
Before work begins, a Gas Safe engineer will conduct pre-installation checks, assessing the number of radiators, water pressure, bathrooms, and the positioning of the current boiler and flue.
Something your engineer will look at during pre-installation checks is the number of radiators in your home. This assessment helps determine the overall heating capacity required. The engineer considers factors such as the size of each room, insulation levels, and the desired temperature to calculate the optimal radiator setup.
The Gas Safe engineer will also check the water pressure, ensuring that it meets the specifications of the new boiler. They may also check the number of bathrooms in your home, their proximity to the current boiler, and any specific hot water requirements.
Step 4: Replacing Your Boiler
With a solid plan in place, the actual boiler installation process can finally begin. The timeline for this phase typically ranges between 1-3 days, depending on the complexity of the job.
Straightforward like-for-like swaps can often be completed in a single day. The installation process involves several critical steps, each contributing to the overall efficiency and longevity of your new boiler system.
The replacement typically follows these steps:
-
- Removing your old boiler: The duration depends on the complexity of the job and the existing system.
- Flush/Clean: According to British Standards, a system flush or cleaning is mandated to maintain the cleanliness of the system water. The type of cleaning may vary based on the system’s condition, with options ranging from a chemical flush to a more intensive power flush.
- Upgrades/Changes to Pipework: The fitting of the new boiler may require some changes or upgrades to existing pipework. This aspect can be time-consuming and requires the installer’s expertise.
- Fitting your new boiler: The installer will fit the new boiler in either the existing location or a new one. Considerations around the relocation of the boiler should be made, keeping in mind potential additional time and cost implications.
- Accessories: Installation of accessories such as a system filter is recommended to protect the boiler from debris or sludge over time. The system is treated with a cleaner and inhibitor to prevent corrosion, ensuring the boiler’s efficiency.
- Commissioning: Once the new boiler is fully installed, the installer will commission the system, ensuring all components function as intended. They will then explain to you anything you need to know about boiler operation, controls, and basic maintenance checks.
- Registration: Either you or installer must register the boiler with the manufacturer to validate the product’s guarantee, offering coverage in case of any issues.
To comply with Building Regulations and Gas Safe rules, Gas Safe businesses must notify local authorities of new gas appliance installations. Make sure you receive a Building Regulations Certificate and a completed Benchmark Certificate.
Step 5: Post-Installation Procedures
Reputable companies often offer guarantees on installations. Take a look at your warranty terms, which may vary from business to business.
If concerns arise regarding the safety of the installation, or if issues persist, follow up with the installer as soon as possible. Gas Safe engineers should check up on any problems or reimburse for the cost of hiring a new engineer.
